I have been operating my own website artnoi.com for almost 2 years, and as a result, this blog is no longer active. If you are following my post, please head to artnoi.com instead.
Category Archives: Uncategorized
Linux: Setting Up Partition Encryption with LUKS
How to setup an encrypted partition on Linux using LUKS (cryptsetup)
Introduction
LUKS (Linux Unified Key Setup) is disk encryption specification intended for Linux. It uses dm-crypt Linux kernel module, is very capable, and has many features, e.g. whole disk encryption or even in-place encryption. Today we are going to do a single partition encryption, i.e. other partitions on the disk remain unencrypted. This could be useful for storing private files without having to re-encrypt the whole disk.
Prerequisites and installation
The software we are going to use is cryptsetup. Most popular GNU/Linux distributions already ship with it. You can use your package manager to get it for you if it’s not installed. The program can usually be found in system program directory, at /sbin/cryptsetup. We will also need a disk partition. I usually start with blank EXT4 partitions. Create one if you don’t have a blank EXT4 partition to avoid data loss since LUKS will destroy all data pre-existing on the partition.
LUKS Formatting
Use lsblk to get block device names, and look for your target partition – in my case it is /dev/sda4. Then, issue:
sudo cryptsetup luksFormat --verify-passphrase -v /dev/sda4
Note that cryptsetup command is case-sensitive. You will then be prompted if you are sure to destroy everything on the partition. After typing uppercase YES, you will be prompted for passphrase which will be used as encryption key.
Opening (decrypting) LUKS partition
Now that our /dev/sda4 has been encrypted, we can decrypt it using:
sudo luksOpen /dev/sda4 enc
Where enc is our decrypted device name in /dev/mapper, i.e. /dev/sda4 is now decrypted and mapped to /dev/mapper/enc. You can supply any name as mapper device name.
Creating and mounting EXT4 filesystem on the mapper device
This is only required for the first time you set up an encrypted partition, because although we have /dev/mapper/enc, it does not have a filesystem yet. We can create an EXT4 filesystem partition using simple mkfs command:
sudo mkfs.ext4 /dev/mapper/enc
This should create an EXT4 filesystem for /dev/mapper/enc. We can now mount it to the root filesystem. I mount it at /mnt/enc:
sudo mount /dev/mapper/enc /mnt/enc
Now we can check if it’s mounted by issuing lsblk or mount.
FreeBSD 12.0: Installing light GUI on ThinkPad X230 (xorg-minimal and dwm)
Introduction
In this tutorial I’ll guide you on how to prepare FreeBSD installation for dwm on ThinkPad X230. This tutorial will also include how to optimize your system for GUI environment.
About dwm
dwm is a suckless window manager. Being a suckless utility, it does not have or load configuration file, i.e. the configuration is done by patching the source code, which also means that if you want to reconfigure dwm you WILL have to recompile it. I recommend using FreeBSD ports tree as source for dwm because it’ll help us install dwm correctly on a FreeBSD system.
Hardware-related:
dbus
Before we proceed make sure that you’ve installed and enabled dbus which is required to run our GUI environment:
sudo pkg install dbus
sudo sysrc dbus_enable="YES"
Or you may manually enable it in /etc/rc.conf by adding dbus_enable="YES" instead of issuing sysrc command
Intel HD 4000 Graphics driver
Now we’ll have to install kms driver for our video card. X230 has i5-3240M on it which has Intel HD 4000 integrated graphics so drm_legacy_kmod should work:
sudo pkg install drm_legacy_kmod
And enable it by adding the following line also in /etc/rc.conf:
kld_list="/boot/modules/i915kms"
You also need to add your user username to video group by issuing the following command. The command below will add user ‘username’ to video group:
sudo pw group mod video -m username
moused
For the middle-button scroll to work on ThinkPad and with proper cursor accelaration, you may have to add the following to /etc/rc.conf:
moused_enable="YES"
moused_flags="-A 2.0,2.0 -a 1.2 -V"
/boot/loader.conf
Add the following entries in /boot/loader.conf:
snd_driver_load="YES" # Load sound driver
kern.vty=vt # Fix virtual terminal
Now reboot FreeBSD for our changes to take effect. I usually do sudo reboot
Installing prerequisites
xorg-minimal and other depedencies
For a window manager to work, we need a display server. I choose xorg-minimal because it has less disk footprint than the full xorg install. We also need some X11 fonts (In this case, Dejavu), xrdb to load external config files, X11 font library libXft, and finally libXinerama for multi-display support. I also want compton for display compositing:
sudo pkg install xorg-minimal xrdb libXft compton dejavu
Building dwm
My workflow for patching and building dwm is quite easy, I first extract dwm source from /usr/ports/x11-wm/dwm and then patch the source in work directory. Building must be done in /usr/ports/x11-wm/dwm or dwm will fail to build and install properly because FreeBSD supplies the OS-specific Makefile in the ports.
Extracting dwm
cd /usr/ports/x11-wm/dwm
sudo make extract
cd work
This should extract dwm source into work/dwm-x.y directory where x.y is dwm version. Take note of dwm version, because it’s important to download the correct version of patches.
Patching and configuring dwm
Now Prepare your patches, find the appropriate version (i.e. the one matching dwm version) and download patches to a convenient location, e.g. $HOME/dwm.patches/:
mkdir ~/dwm.patches
wget ~/dwm.patches/ http://dwm.suckless.org/patches/link/to/dwm-patch.diff
Patch the source code in work directory, I’m using git apply here:
sudo git apply ~/dwm.patches/dwm-patch.diff
If no errors were encountered, you should now be ready to build dwm. You must configure dwm before it is built. Now, copy the default config file config.def.h to config.h and edit the copied config.h file with your configuration. We will point to this config.h file later during make install so that the compiler applies our configuration and patches:
cd  work/dwm-6.2
sudo cp config.def.h config.h
sudo vim work/config.h
After you are done with editing and patching, it’s build time! Go back to the ports directory of dwm and build it! Don’t forget to supply DWM_CONF flag to point to your patched and customized config.h file other wise it’ll fail. The path can be absolute or relative to the working directory. FreeBSD should present you with its own menu dialog for system-supplied patches (e.g. install sterm and dmenu, etc.) and you can check the boxes according to your needs:
cd  /usr/ports/x11-wm/dwm
sudo make DWM_CONF=work/dwm6.2/config.h install clean
If it succeeds, you should now add .xinitrc file to your $HOME directory to tell X to start dwm. My .xinitrc looks like this:
xrdb -merge $HOME/.Xresources &
compton --config $HOME/.config/compton/compton.conf &
exec dwm
Note that lines after exec dwm will not be executed and hence why I put it at the bottom. After .xinitrc is created, start X Server by issuing:
startx
This should source $HOME/.Xresources file, start compton, and start dwm.
FreeBSD 12.0: Enabling Wi-Fi on ThinkPad X230
FreeBSD 12.0: Enabling Wi-Fi on ThinkPad X230
The rant
Recently I just got my new laptop, ThinkPad X230 from 2012. Actually, this is my first non-Apple laptop, so I decided to try FreeBSD on it. My other laptops feature Apple’s secure boot chips T1 and T2 which will prevent booting into OSes other than macOS and Windows, so this is the first time I got to try Linux or BSDs on my own laptop computer. Upon receiving the machine I installed Manjaro i3 and MX Linux right away, as those are my main Linux desktop daily drivers. Days after, I decided to run some flavor of BSD on this nicely boxy, underrated machine. Just for fun.
How to get WiFi working on FreeBSD on ThinkPad X230 with Intel Centrino Advanced-N 6025 network card.
During FreeBSD installation you should be prompted to configure IPv4 and IPv6 for your network interfaces. I have never successfully configured any wireless interfaces with this menu during installation, be it on my 2013 iMac or on this Lenovo machine, so I ‘kinda’ expected it to fail and just connect the laptop via Ethernet first to configure em0 to fetch and install FreeBSD patches with freebsd-update. You don’t need Ethernet in order to get WiFi working, just finish the installation normally without configuring wlan0 and reboot. Yes, we will manually configure the WiFi to work after we reboot into our freshly installed FreeBSD 12.0.
Note: Upon successful boot, if there is no internet connection and if you set ntpd to ‘enabled’ during installation, then the ntpd daemon will complain a lot and mess up with your serial console output, so I recommend not to enable ntpd yet before you setup your wireless networking. You can always enable ntpd later as easily as by adding an entry in /etc/rc.conf file or issuing sysrc command.
Step 1)
Upon reboot, check your network interface cards by issuing (as root):
# sysctl net.wlan.devices
This should return iwn0, which is for the Intel Centrino Advanced-N 6025 in our X230. Take note and proceed.
Step 2)
Now that we know which device will be our wlan0 interface, we will edit the /etc/rc.conf file so that FreeBSD knows iwn0 is wlan0, and set the correct regulation for our wireless connection (check your own country code and regulatory domain, for example FCC for US, ETSI for UK, APAC for TH), and that after the handshake we would like to use DHCP. (You can explicitly choose static IP but for the sake of simplicity and just trying to connect I will go for DHCP. If you choose to go static, provide your inet, subnet, and default gateway addresses.)
# [ /etc/rc.conf ]
wlans_iwn0="wlan0"
create_args_wlan0="country TH regdomain APAC"
ifconfig_wlan0="WPA SYNCDHCP"
Step 3)
Now that we know the device, add the following entries to /boot/loader.conf file to tell FreeBSD to load the relevant wireless networking modules (we actually won’t need to tell it to load the drivers or firmware because it is usually loaded for us, but I’ll just leave them commented out here in case it’s useful for other people):
# [ /boot/loader.conf ]
#if_iwn_load="YES"
#iwn6000fw_load="YES"
#iwn6000g2afw_load="YES"
#iwn6000g2bfw_load="YES"
#iwn6050fw_load="YES"
wlan_scan_ap_load="YES"
wlan_scan_sta_load="YES"
wlan_wep_load="YES"
wlan_ccmp_load="YES"
wlan_tkip_load="YES"
Step 4)
We’re almost done, except that we have not yet populated our WPA configuration file with our SSID (Wi Fi name) and PSK (pre-shared key or your typical WiFi password). Now add the following entry to /etc/wpa_supplicant.conf:
# [ /etc/wpa_supplicant.conf ]
ctrl_interface=/var/run/wpa_supplicant
ctrl_interface_group=wheel
network={
    ssid="YOURWIFI"
    scan_ssid=1
    psk="YOURPASSWORD"
}
Reboot now, the splash screen should tell us if iwn0 is already loaded or not, if not and connection failed, try adding the lines with driver loading statements from Step 3 to /boot/loader.conf and reboot and see if it works. If iwn0 is loaded but there is no wlan0 carrier anyway, try editing /etc/wpa_supplicant.conf and /etc/rc.conf and reload netif by issuing (as root):
# service netif restart
Unrelated: How to dualboot UEFI FreeBSD and Linux with one EFI partition using GRUB2
The FreeBSD installer has guided steps so the installation was easy and smooth, except the disk partition part where I decided not to create a EFI partition which ‘FreeBSD required to boot’ because I hate having 2 EFI partitions on the same disk. Sure enough after the installation I could not boot into FreeBSD. The solution here is to use Linux on my machine to copy BOOTx64.efi from the live USB to the existing EFI partition on my machine, in my case it is (when mounted under /boot/efi) conveniently located at /boot/efi/EFI/FreeBSD/BOOTx64.efi. Then I edited the 40_custom file in /etc/grub.d (on my Manjaro root, as grub was installed with Manjaro) to look something like:
# [ /etc/grub.d/40_custom ]
menuentry "FreeBSD" --class freebsd --class bsd --class os {
    insmod bsd
    insmod ufs2
    chainloader (hd0,gpt4)/EFI/FreeBSD/BOOTx64.efi
}
# FreeBSD was installed without explicit own EFI partition, so I copied the bootloader file BOOTx64.efi from FreeBSD live USB's EFI partition to the main disk's existing EFI partition (/dev/sda4 or hd0,gpt4)
Then, update grub configuration file with:
$ sudo update-grub
grub should detect FreeBSD installation as ‘unknown Linux distrobution’. Then reboot, and your grub menu should now present you with an entry for FreeBSD.
Note: This is my first ‘serious’ FreeBSD installation, but despite all the hassles, thanks to very nice documentation and support from the FreeBSD community, I have had a very good time learning and tweaking my system to boot and get WiFi working. I remembered it being much worse with Linux where official documentation from the distros suck, but with FreeBSD, reading the FreeBSD documentation and handbook is very fun, cohesive, challenging and educating. This is what prompted me to write this piece, just in case someone with a X230 had non-working WiFi out-of-the-box and was looking for help. Hope this helps!
Review: Sennheiser HD 600
I know you may have read ‘the Sennheiser HD 600 is the standard by which modern headphones are measured’ kinda statement everyday when you read an HD 600 article, but trust me, those words are real.

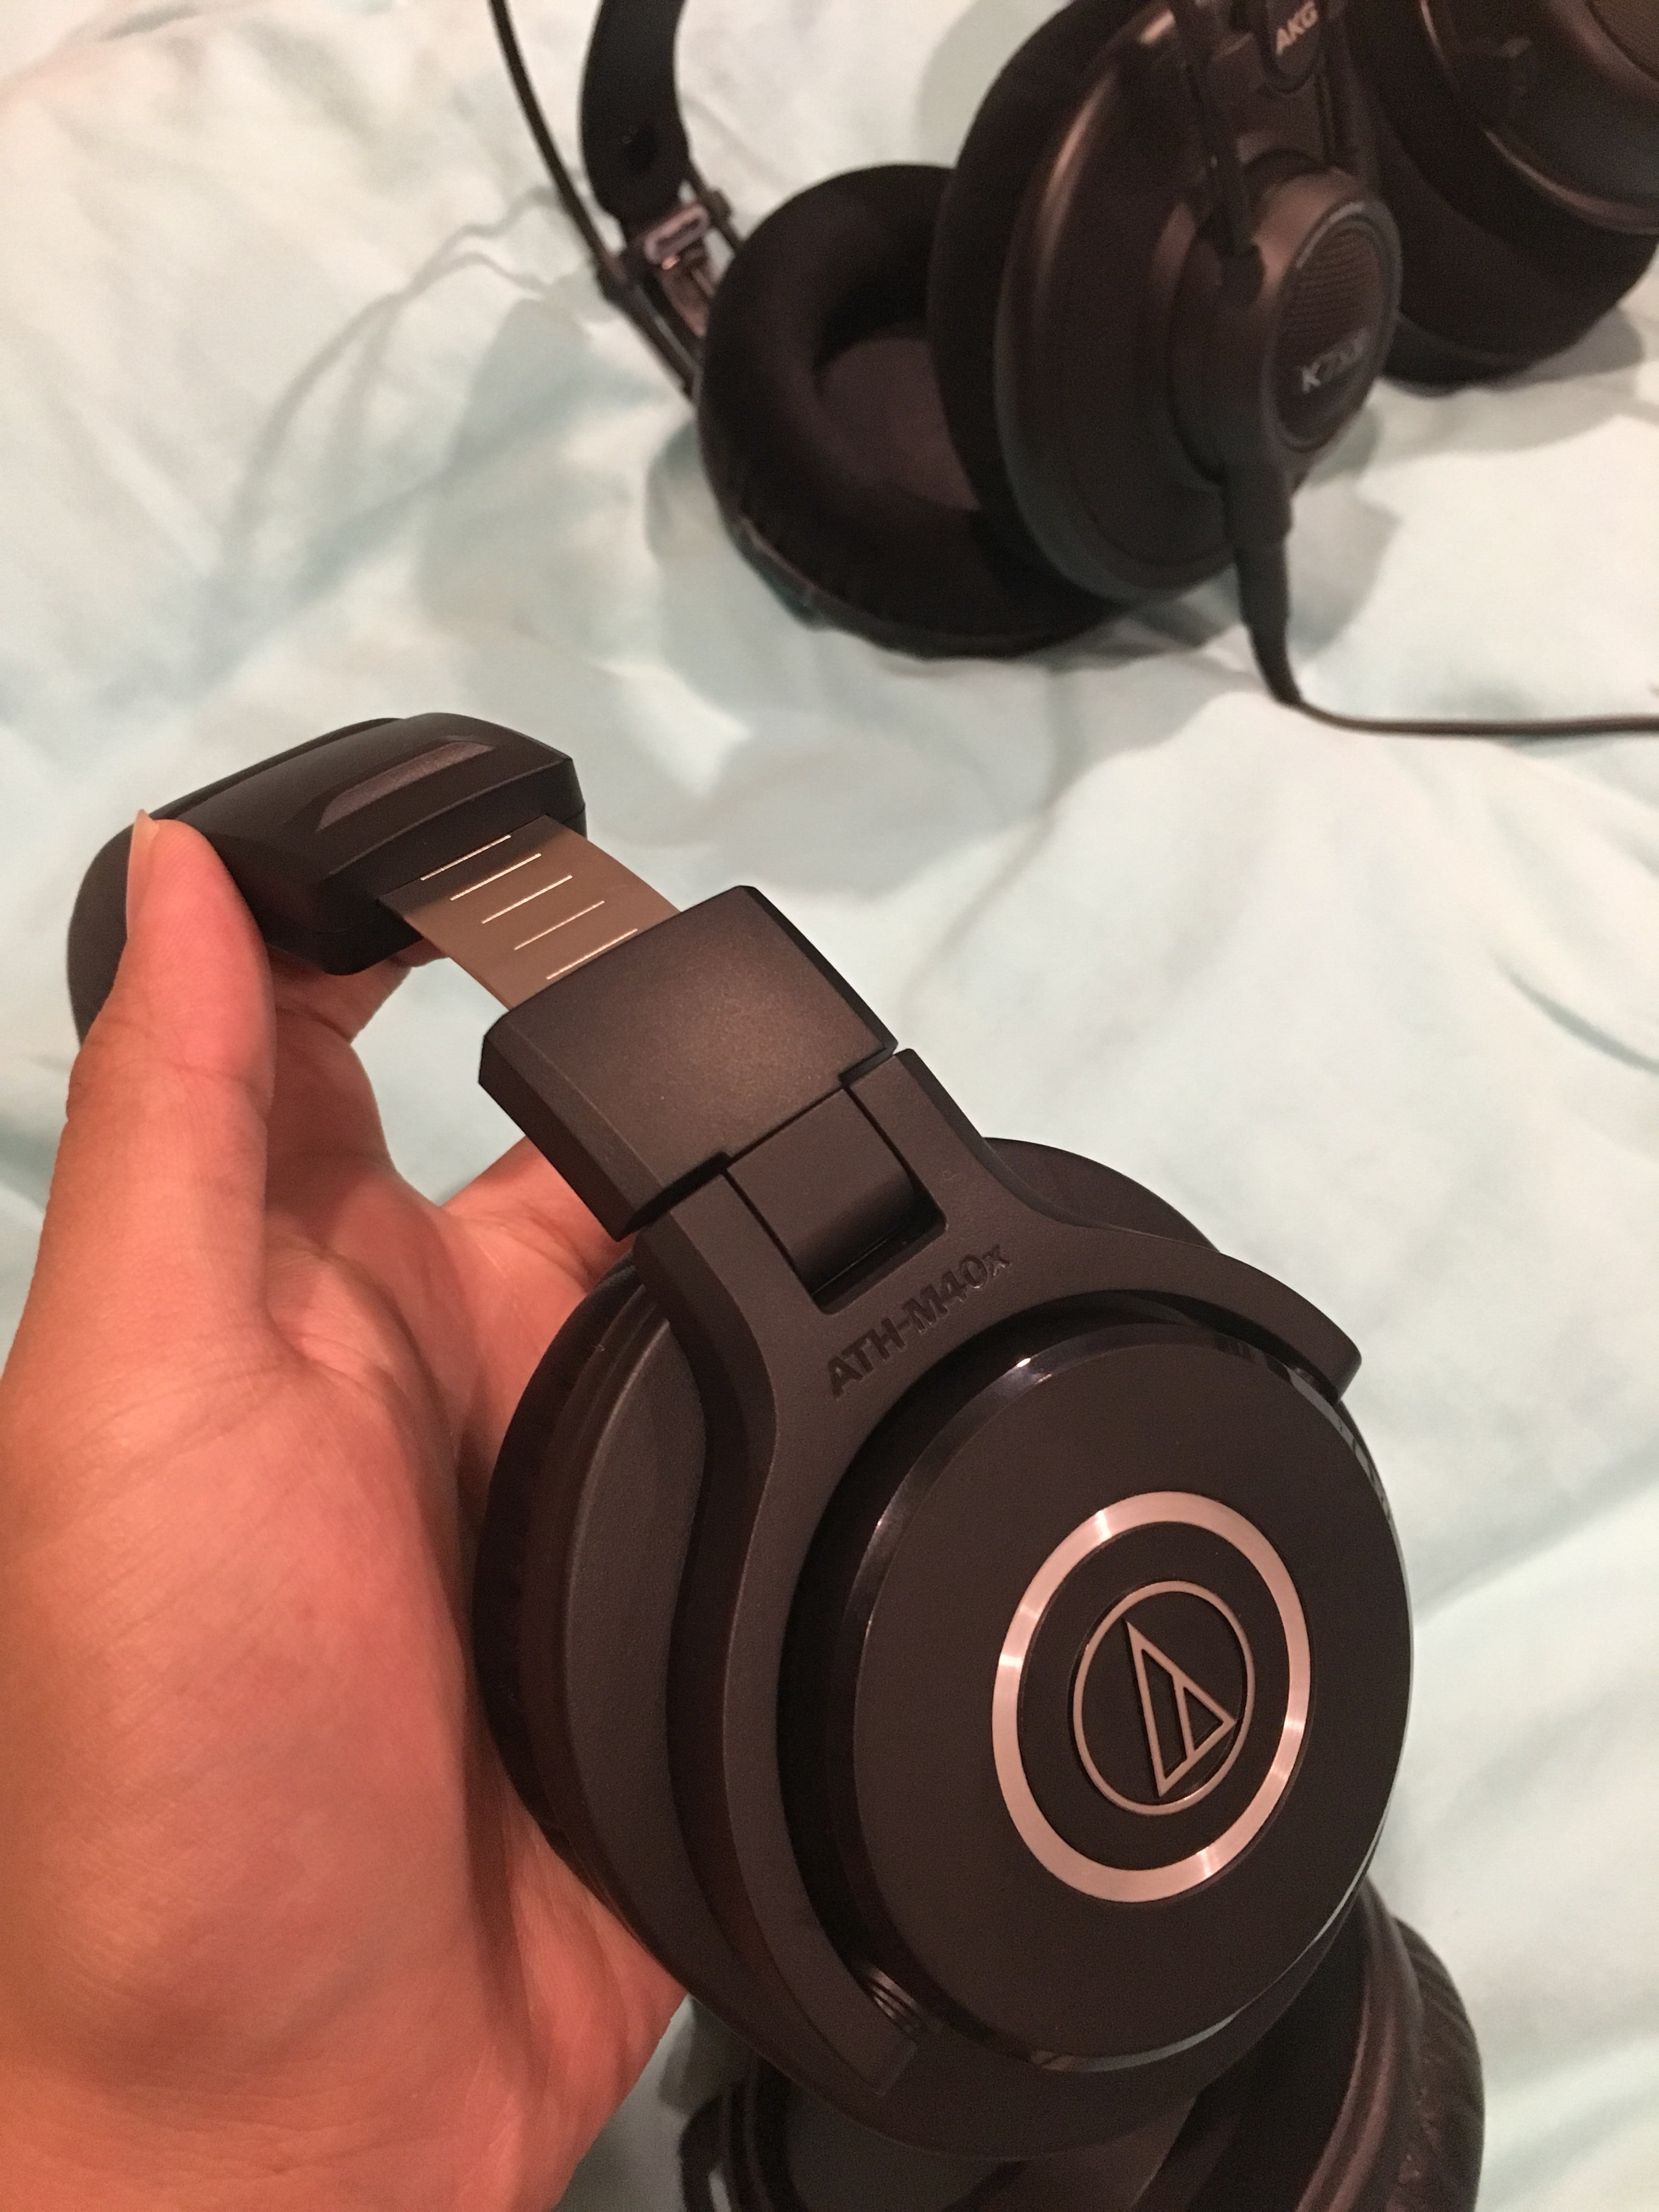
My HD 600 and ATH-M40X
Sennheiser is probably one of the most important company in headphone industry, if not the most important itself. Over the years it has launched many spectacular products, most recently (2017) HD 660s, which is a derivative of the HD 600 reviewed here.
Sennheiser HD 600 is circumaural, open-back, reference-class professional headphones. Since HD 580’s launch in 1993 and HD 600’s in 1997, the HD 600-series has become undoubtedly one of the most important headphones in the industry. Its influence on professional headphone market is comparable to that of Beats by Dr.Dre to consumer headphone market.
The HD 600 came out in 1997, exactly my birth year 20 years ago, yet it still manages to be in production for over 20 years, acquiring its own sweet spot for music lovers and recording engineers alike, and hence securing its own place within Sennheiser’s very dynamic product lines. The HD 600 is the tried and tested staple product for Sennheiser and will sell for years, very much like the 30-year-old DT880 for Beyerdynamic. The HD 600, and their brothers HD 650 and 660s, are regarded as one of the best open studio monitors in the market. The outstanding acoustic performance placed the HD 600 in what was known as the holy trinity along side DT880 and K701.

Even with its 300 Ohm rating, the HD 600 can very efficiently play ‘loud’ recordings particularly pop songs with relatively medium-power source. MacBook Pro’s 2V output is enough for most music, with the exception being some very dynamic (or quiet) recordings
Specifications
Nominal Impedance: 300 Ohm (condition unspecified)
SPL: 97dB/1V
THD: 0.1%
Contact Pressure: 2.5 Newton
Transducer Principle: Dynamic
Rated at 300Ohm, these are perfect for any sources that are strong enough to drive it loudly without distortion. Higher impedance also draws less current given equal power, which is why professional headphones tend to be of high impedance to avoid damages from the headphones drawing too much current from the sources. The higher impedance of 300 Ohm rating ensures that the load impedance is much higher than source impedance, thus minimizing amplifier distortion due to poor damping factor. With superior damping factor, you can be worry-free when connecting it to sources with higher output impedance like tube amplifiers.
Build Quality and Comfort
The phones are made in Ireland and they have somehow decent build quality. They do not feel tank-like like my German-made DT880s. They’re very light and comfortable. The headphones are built from high-quality plastic with glossy black and grey finish which I personally like. The earpads and padded headband are comfortable and my relatively big ears don’t touch anything. The clamp is strong and secure, you can move around with confidence. They come with a 3-meter foolish proprietary detachable cable and an absurd proprietary 6.3mm adaptor included in the package. The cable has red R/L indicator on the right connector. The cable and adapter are useless without the headphones.
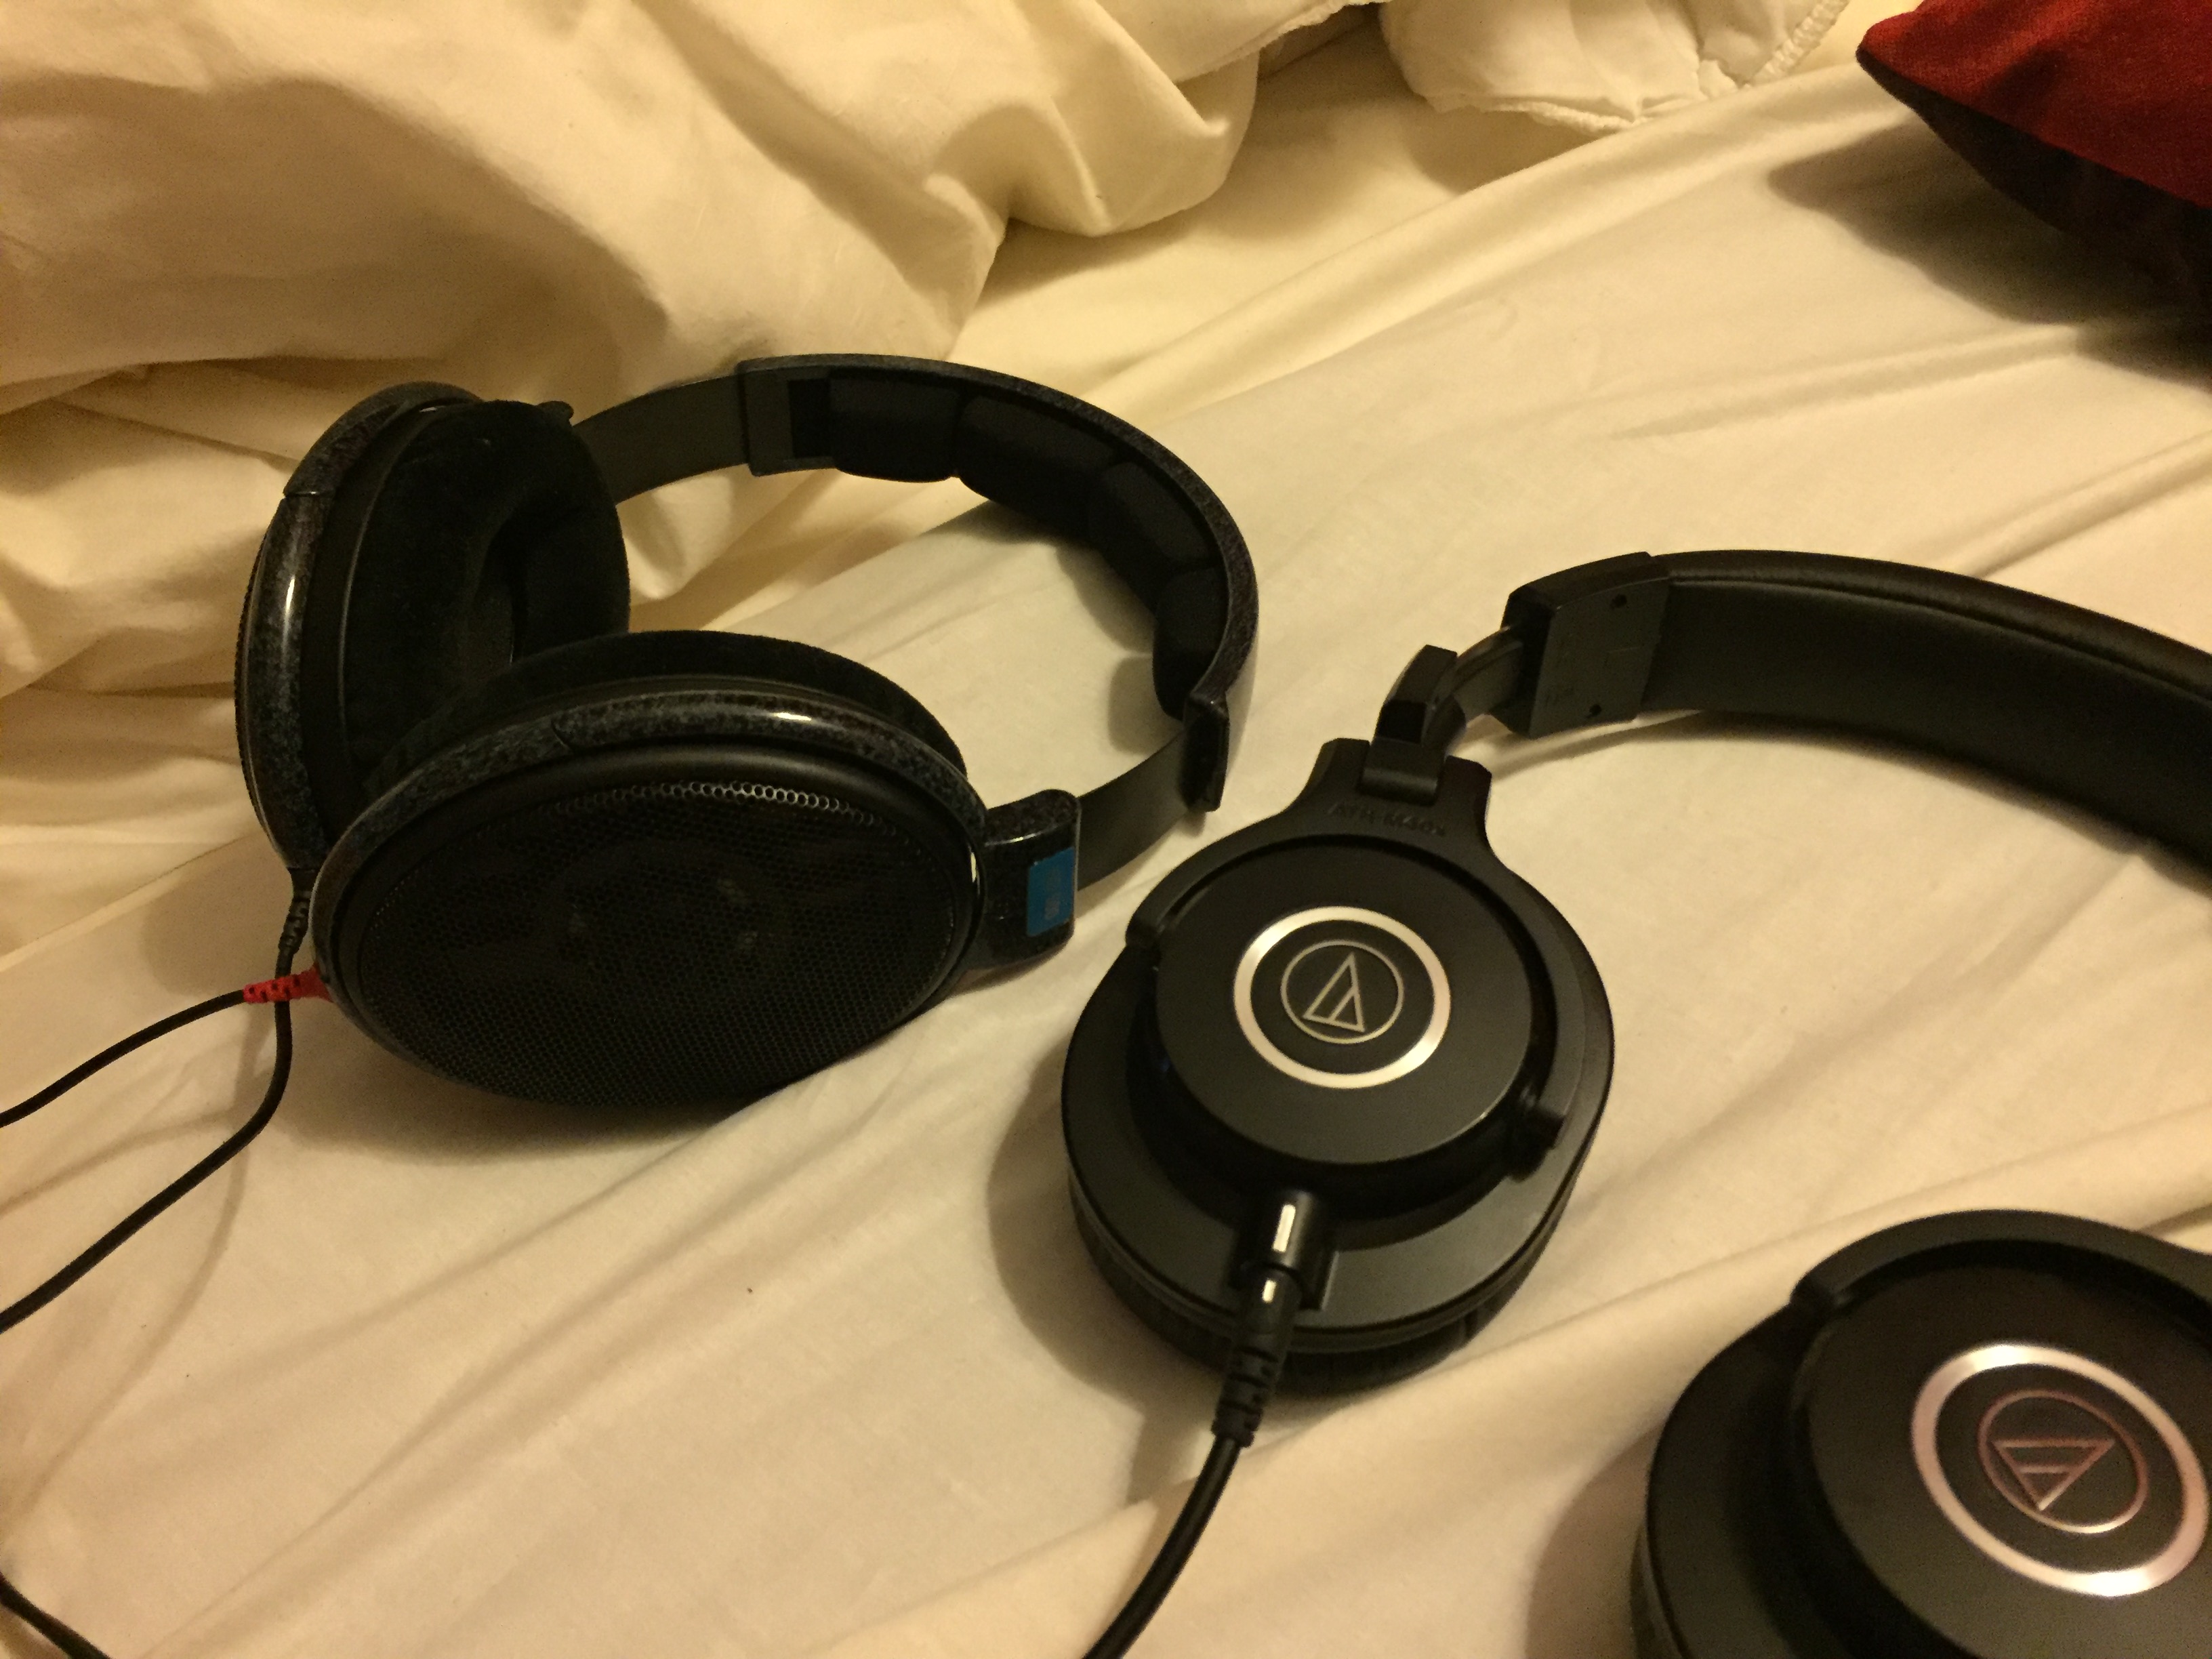
The professional open-back HD 600 along with my prosumer closed-back M40X
Sound
Regarded as one of the best monitors in the market, these are essentially neutral and mixing-friendly headphones. I have already owned all three of the holy trinity, yet I found each of them uniquely perfect for circumstances. Compared to strictly ‘bright cans’ like DT880s, the 600s are more reserved and relaxed. Compared to the infamously wide K700-series, they are more confined. Personally I do not have issue with ‘Sennheiser veil’ as I find it great for certain music that my DT880s and K7XXs tend to deliver too bright sibilant trebles, especially the former which has treble peaks around 7KHz.
Although the trio (DT880, K7XX, HD 600) are supposed to be accurate, neutral, non-coloring headphones, I find each of them suits different recordings, and that the HD 600 is the most forgiving and versatile, compared to the strictly neutral DT880 or the community-made K7XX.
Subjectively speaking, these are more lush, although with great low frequency response and authority, vocal clarity, precise spatial positioning, and smoothly rolled-off trebles. One of the reasons I’m slowly loving the HD 600 is because the trebles are never harsh to me, a 20-year-old with hearing range up to 18kHz.

The Sennheiser HD 600
Below are other reviews and measurements for Sennheiser HD 600
https://www.innerfidelity.com/images/SennheiserHD600.pdf
https://homestudiobasics.com/the-sennheiser-hd-600-review-gold-standard/
Find out Why the Sennheiser HD 600 is Still One of the Greatest Headphones

FR graph from the aforementioned InnerFidelity link.
Suggested Readings: iPhone Audio Measurements
All texts copied from my original Facebook post
Let’s have a look at audio measurements of the world’s most popular audio sources from the world’s richest company (as of 2017) – the iPhones.
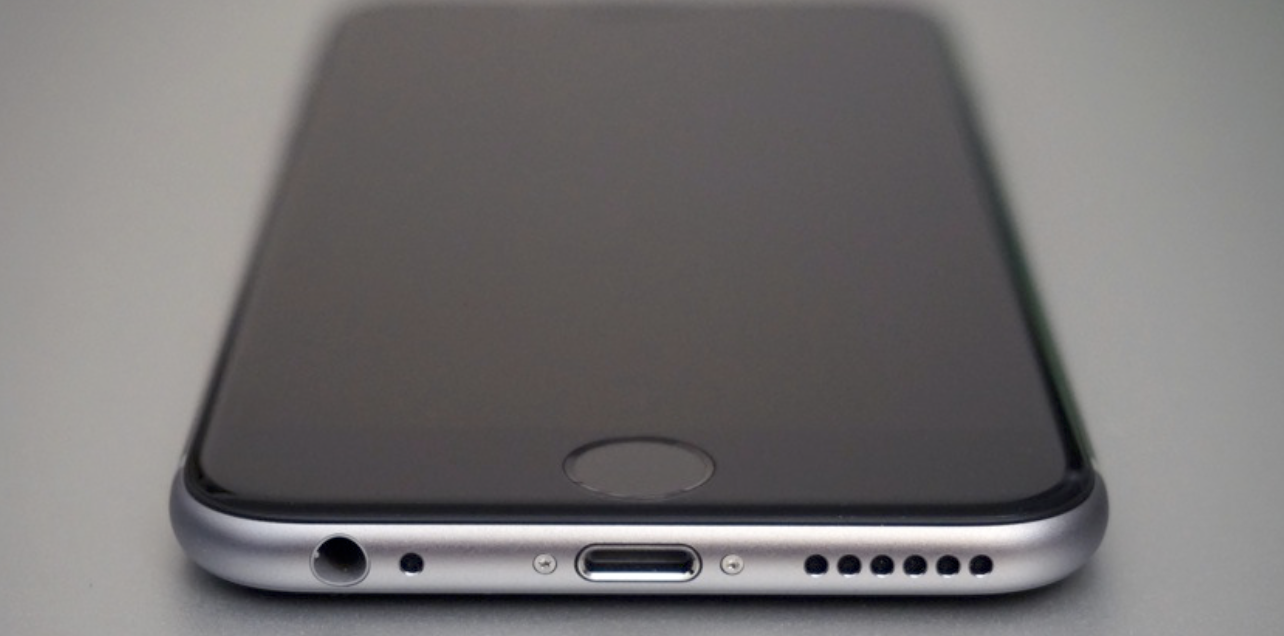
iPhone 6s was the last major iPhone to feature 3.5mm headphone port. The picture features iPhone 6 which is externally identical to the 6s. Credit: Ubergizmo
With its vast resources, Apple can hire top talents to create wonders, even with their tiny $9 lightning to 3.5mm audio adaptor (A1749) which measures much better than some audiophile external DAC/Amp units. iPhones are also very capable audio performers for mobile devices, beating the crap out of AudioQuest Dragonfly (1.2) in noise, crosstalk, and THD level. This indicates that unless you’re not getting enough power from the headphone jack, you do not need any inferior, subpar, and underperforming external DAC/Amp units from audiophool companies. However, as confirmed by the FR graphs in the attached link, neither of both iPhones is capable of 96kHz playback, which isn’t necessary at all unless you can hear beyond human capabilities.
Yeah, even the audio engineers at Apple don’t see the importance nor potential of Hi-res audio, despite the fact that Apple is one of the bravest and most innovative firms in the industry.

Apple Market Capitalization, as of Dec 2017.
Please also note that Apple has removed analog audio outputs from its newer iPhones since the launch of iPhone 7 in 2016. That same year, it removed standard USB-A ports and MagSafe from MacBook Pros, a line of prosumer laptops, for smaller and more versatile USB-C ports. In 2017, Apple A11 Bionic SoC managed to get 10,000 CPU score that rivaled the Intel Core i5 6267U in 13-inch MacBook Pro with Touch Bar. You can see how fast the fruit company is continuously refining its products, yet iPhone’s audio capabilities stop at Redbook, a standard introduced 30 years ago. That’s not because Apple’s indifferent, but because the audio quality has already been always good enough.
Suggested Readings:
iPhone 4 and 6 audio measurements http://archimago.blogspot.com/…/measurements-apple-iphone-4…
Apple A1749 Lightning audio adaptor measurements
http://www.kenrockwell.com/…/lightning-adapter-audio-qualit…
http://reference-audio-analyzer.pro/…/apple-lightning-audio…
Defining Audio Fidelity
All texts copied from my original Facebook post.
What defines audio fidelity?

Footage of Fidelity (2000)
How do you define audio fidelity? What’s the parameters? Here in the attached link, Ethan Winer defines it for you.
Sound, for all the nuance and excitement if offers, only operates in two dimensions: Time and intensity. In turn, only four parameters are needed to assess everything that affects audio fidelity: Frequency response, distortion, noise, and time-based errors.
These four basic parameters define everything that affects audio fidelity. As powerful as it is, there’s no secret “magic” to sound, no unknown parameters that “science” hasn’t yet learned to identify, as is sometimes claimed. The closer an audio signal is to the source across these four parameters, the higher its fidelity.
Ethan Winer, https://sonicscoop.com/2014/04/24/defining-audio-fidelity/
Audiophile equipment manufacturers often claim to possess some magical feature not scientifically related to audio, and for most of the time, don’t measure these 4 parameters correctly resulting in underperforming audio gears.
Most people also don’t know that today’s audio equipments measure very well, to the point that you won’t, in double-blind test, tell apart a cheapo DVD player from a Hi-Fi dedicated CD transport with a standalone DAC. In a blind test, even self-claimed golden ears fail to prefer high-end power amp over garden-variety AVR. And most don’t know that DACs in smartphones also perform so well that their distortion is much below human limit. With most modern DACs, jitter, while also one of the 4 parameters, don’t really matter and less than 0.01 percent of world’s population (or none at all) would be able to reliably hear it. Jitter is millions of times smaller than analog audio’s time-based errors, say, faulty spinning rate of turntables.
Now that you see many gears are so good these days, you’d wonder why some gears are better. It’s about compatibility. You’ll need a DAC if your computer doesn’t have line level output to feed your amplifiers. You’ll need headphone amplifier when your source doesn’t play loud enough. You will need bigger power cord if your stock wire is under-speced. You’ll need new USB cable of your current one is too short. You’ll need new headphone cable only when its original length is troublesome.
And now that you know there’re only 4 parameters required to measure audio fidelity, some of you may wonder what about soundstage or other miracles. And also if analog audio measures very poorly, then why is it more preferable?

First, soundstage doesn’t change the very fact that sound is two-dimensional. Such phenomenon is the result from Stereo Imaging, or frankly, your beguiled brain.
Second, good sounding is a subjective adjective. Fidelity is objective. Analog audio is in every possible way inferior to digital audio. It has seriously worse time-based errors, and much higher noise floor. I suspect the reason people perceive digital to be more ‘noisy’ or ‘sharp’, ‘harsh’ or even ‘less enjoyable’ is because of habitual effects and expectation bias. People coming from analog systems, and with heads full bias, are going to perceive the much cleaner and higher-fidelity solid-state and digital system as sterile, dry, boring, etc. because they’re used to their good old analog devices producing more harmonic distortion and less damping factor we like what we’re used to. Every once I use one pair of headphones exclusively, my others just sound bad, too dull, or too bright compared to the current pair. We need time to adjust our ears and heads. And when some notice their gears sounding better, they think it’s because of burn-in, not because of their preference having been steered. Beyerdynamic officially recognizes this problems and called the phenomenon ‘habitual effects’. When digital audio first came mainstream, say, in the 70s, most recordings were done in analog format and hence the tape hiss and all the noise was carried over to CDs. People were never before able to experience such high-def audio quality in analog gears, so when digital audio reveals flaws of analog recording, people blamed digital audio. It would be worth noting that a cheapo CD player has way much more fidelity than a high-end turntable does. And of course, there’re still some audiophiles swapping op-amps expecting better soundstage, clarity, musicality, etc.
Do I need a headphone amplifier?
All texts copied from my original Facebook post

Woo Audio WA234 Monoblock Tube Amplifier
Do I need an amp?
If so, should I buy balanced, or tube amp?
Is my iPhone’s DAC efficient?
Is Hi-Res music really better?
Let’s talk objectively.

Actually unless your device has very poor audio performance (i.e. very high distortion or output impedance) or it’s tube, an amp doesn’t matter if the music is loud enough.
Don’t be fooled by 0.1dB extra loudness that people perceive to be better sounding. An external amplifier sounds better because
(1) it’s louder – again this is proven by psychoacoustics studies that people hear louder music as sounding better
(2) it has MUCH finer volume control so when you adjust the volume, you push it further by a slight of 0.xdB, thus making it sound ‘better’
(3) good amp design often have very low output impedance, which allows efficient electrical damping, which in turn enables the amp to better control the driver’s movement. (The sound becomes more precise, with better separation and greater speed and clarity). Benchmark amps, Violectric amps, O2 amps, almost all the objective companies aim for low-impedance designs for their amps. Exceptions are ‘tune-by-ears’ companies, say, NuForce, Grado, etc.
(4) Bias – both expectation bias and confirmation are very powerful. The moment you are comparing things your brain already thinks ahead and adds some predetermined qualities to your judgement.

Bias is powerful and impairs out judgement very critically.
To prove my assumption with the most objective results, I conducted an unsighted blind test at matched volume level with 4 of my ‘audiophile’ friends to eliminate biases. The result? None were able to distinguish Sandisk Sansa Clip+, Xduoo X3, MacBook Pro, and Hidizs AP60+Fiio E17k+Fiio A5 combo with statistically significant result. On any headphones. Period.
So here I repeat my words. Unless your device has very poor audio performance (i.e. Z out>10 Ohm), or it’s tube, you’re not gonna tell apart solid state devices with decent audio quality.
So why some amps sound different? Because they aren’t well designed, or they tune things by ears, not by measurement. Amps with higher Z out tend to sound warmer, because headphones’ bass response is compromised. The driver couldn’t stop in time and hence the ‘slightly boomier bass’ that brings warmth. Headphones with lower impedance will suffer more from this amplifier distortion effect. AKG and Sennheiser stated they design their flagship headphones to be used with zero-ohm source. However, some zero-ohm source devices still have been known for deviation in FR graph. The example would be Hidizs AP60 (<1Ohm) and iPhone 4 (<2Ohm) that has serious lower frequency roll-off. Most late iPod models (<10Ohm) also share the same traits, sounding ‘colder’ despite higher output impedance.

ODAC USB DAC and O2 headphone amplifier, presumably the best performers for below $100 in term of sheer performance. Actually 80% of audiophile products are out-of-leage to compete with these 2 devices.
Tubes sound different, mostly warmer because of 3 main reasons.
1. Soft-clipping in tubes is more euphoric than hard-clipping in solid-state
2. Tubes have very high output impedance, so generally speaking, they induce more amplifier distortion.
3. Tubes have much higher noise floor that will add warmth to the music.
Balance-drive amps are worse for headphone application, because they have more distortion and noise. Benchmark, which is the benchmark company for objectivists (and their products have been benchmarks and standards) says in their website why dont they make balanced amp. Each balanced amp will be seen by headphones as 2 different amps with ‘differing’ qualities since there’s no way to match these sub-amps, so the noise is doubled, so is output impedance. Distortion increases as each sub-amp will drive half of the load impedance. And because differences in the sub-amps, when the hot and cold signals are combined, it gets distorted more than SE system does.

If tubes are actually better them why don’t people use tube computers? Well, that’s because transistors are more precise, noiseless, and very power efficient.
And for all those DAC/amp combo, all ‘decent’ DACs sound the same. Their distortion levels are far below human perception. If you hear differences in an ‘audiophile’ DAC, it’s very likely distortion introduced by the manufacturer to differentiate its products. Difference sells. What about the specs of DACs? Does it matter that my DAC ship must support 32bit audio? No. Because there’s no way you can truly enjoy 24bit files, let alone 32bit.
Sure, higher bitrate has more headroom for information (in this case dynamic range and frequency). But such enormous headroom is only for mixing and mastering processes. These 24bit files have 144dB of DNR, or, the quietest signal is 1dB and the loudest one is 144dB. Most recordings have at most 60dB of DNR so additional decibels or headroom are useless. It may be true that in ‘real world’ the possible dynamic range is immeasurably huge, but the engineers who mastered your recordings only compressed them to 60dB.
16bit data of audio CDs equals to 96dB of DNR, which is best to enjoy 60dB music without deafening yourself. Sure you can lower the volume of true 96dB music to keep it from reaching 96dB, but technically speaking, assume that your music has all that 96dB of 16bit data, and you want every detail to be heard (or you want the quietest signal to reach 1dB) in a 30dB room, your peaks of your music would hit 126dB SPL, which is very dangerous for your hearing. And 144dB of 24bit when played back in that same room, ceteris paribus, would hit over 160dB SPL. 160dB SPL can kill people. And it had done so many times.
Assuming you can tolerate 144dB of true 24bit tracks, your audio system is however not gonna played that file in true 24bit for you. It is going to have one bottleneck in the chain that will ruin your true 24bit playback. Most amps, which are the last frontier before the signal leaves into the transducers, are only capable of around 120dB of DNR. So that 144dB range of 24bit audio is completely useless. 24bit only matters for mixing and mastering application, because that additional dBs will provide more headroom for the engineers to use, after they’re done with tweaking they will compress it to around 60dB for our playback.
Beside bit-rate, there’s also one more important value of digital audio: The Sample Rate. It defines how many times per second will a digital data be converted to analog waveform. Higher sample rates relate to higher frequency range, which, if too large that it covers some hundreds of kHz, will induce more IMD in the audible spectrum.
The standard for Audio CD or the Red Book has been proven to be the most practical standard for digital audio for human use. The Red Book 16bit and 44.1kHz numbers didn’t come out of nowhere. It refers to the very foundation of digital audio; Nyqvist theorem says that the sample rate of data has to be 2 times greater than the frequency range of the signal, so 44.1kHz of Sample Rate equals to some 22kHz of frequency range. That additional 2kHz over human’s maximum 20kHz hearing is for low pass filtering during conversion process. Digital audio has foundation in the theorems. So before you understand digital audio, make sure you understand theorems.
This is my contribution to the audio society, for I believe it is civic duty to help people better understand basic audio application. References are listed below
NwAvGuy: Impedance http://nwavguy.blogspot.com/…/02/headphone-amp-impedance.ht…
Benchmark: Balanced Amps https://benchmarkmedia.com/…/audio-myth-balanced-headphone-…
Tube sound: http://kenrockwell.com/audio/why-tubes-sound-better.htm
CD sound is all you need: https://xiph.org/~xiphmont/demo/neil-young.html
Head-Fi thread: 16bit vs 24bit https://www.head-fi.org/…/24bit-vs-16bit-the-myth-exploded…/
What we measure is what we hear.
All texts copied from my original Facebook post
What we measure is what we hear?
My stance on this topic is that, audio measurements vastly affect what we hear, albeit in diminishing return fashion.
You probably know how worse our ears are compared to other animals’ or audio instruments, and that digital revolution has as well transformed the audio playback chain, not just the internet, to the point that most capabilities of modern properly designed audio gears should measure well beyond human hearing limit. Once you crossed the border, there’s virtually no need to improve something to get audible differences, since only your dog Daisy could hear it. The inaudible minute imperfections will further be masked by relatively much higher transducer distortion, so unless you had ideal transducers, I couldn’t see any benefit of using gears that are more capable. However, I do respect hardcore audio geeks like NwAvGuy who, in 2011, perfected his ODAC that left Benchmark DAC1’s benchmark performance in dust. I remember he was tweaking his design to achieve a few less dB of noise despite the fact that the ODAC itself was already outputting noise level under -100dB A-weighted. That’s well below CD audio’s 96dB dynamic range! You’re not likely to hear noise once the level is past -96dB.

Measuring audio fidelity
Sure, a 5dB peak or relatively large nonlinearity in FR may be audible to most, but if the peak is placed beyond 22kHz then most adults won’t hear it. If noise is very present at -40dB then some may of course hear it. But if it’s well below -90dB, I doubt if any subjectivists can detect benefits of their ultra low noise Sony audiophool SD cards. Lossy audio codecs are also very tricky ones with old listeners. I genuinely wonder if they could actually notice the dumped higher frequencies of lossy codecs.
Since the advent of transistors, audio has progressed very rapidly and most professional audio engineers like folks at AES agree that today’s standards even one as old as CD audio from the 80’s are already very good and most suitable for humans and their respective transducer performance, unless you own subpar, low-fidelity, high-distortion audio gears. Audiophiles, however, believe that their visually pleasing systems offer more audible benefits. And while they cherish their extremely high-tech, state-of-the-art, 2017 DSD DACs, they treat their systems if the audio world had been left in dust since 70’s when the very first solid state amplifiers appeared on the market and they hated them because the soft-clips were missing.

Various audio parameters being tested
Today’s objectivist audiophile will agree that unless there’re measurable differences that fit in human hearing range, no differences should be heard at all. And because science wins, it’s very to figure no vinyls can beat a CD for audio fidelity, ceteris paribus. Class D amplifiers, though loathed by audiophools, are now in use in most high-fidelity studio active monitors. Receivers, powered by digital amplifiers of course, also measure well enough to be used in place of stand-alone amplifiers, while at the same time offering more functionality such as video connectivity and mobile device integration. Try pass signal through a glass optical cable and a plastic one, and they’re 100% identical despite the audiophile salesman quoting that one is superior to another.
When you start evaluating audio using your ear, what you describe is actually what you think it might sound like. Only with your eyes closed can you truly begin to enjoy music, not the visual aesthetics of audiophile products.
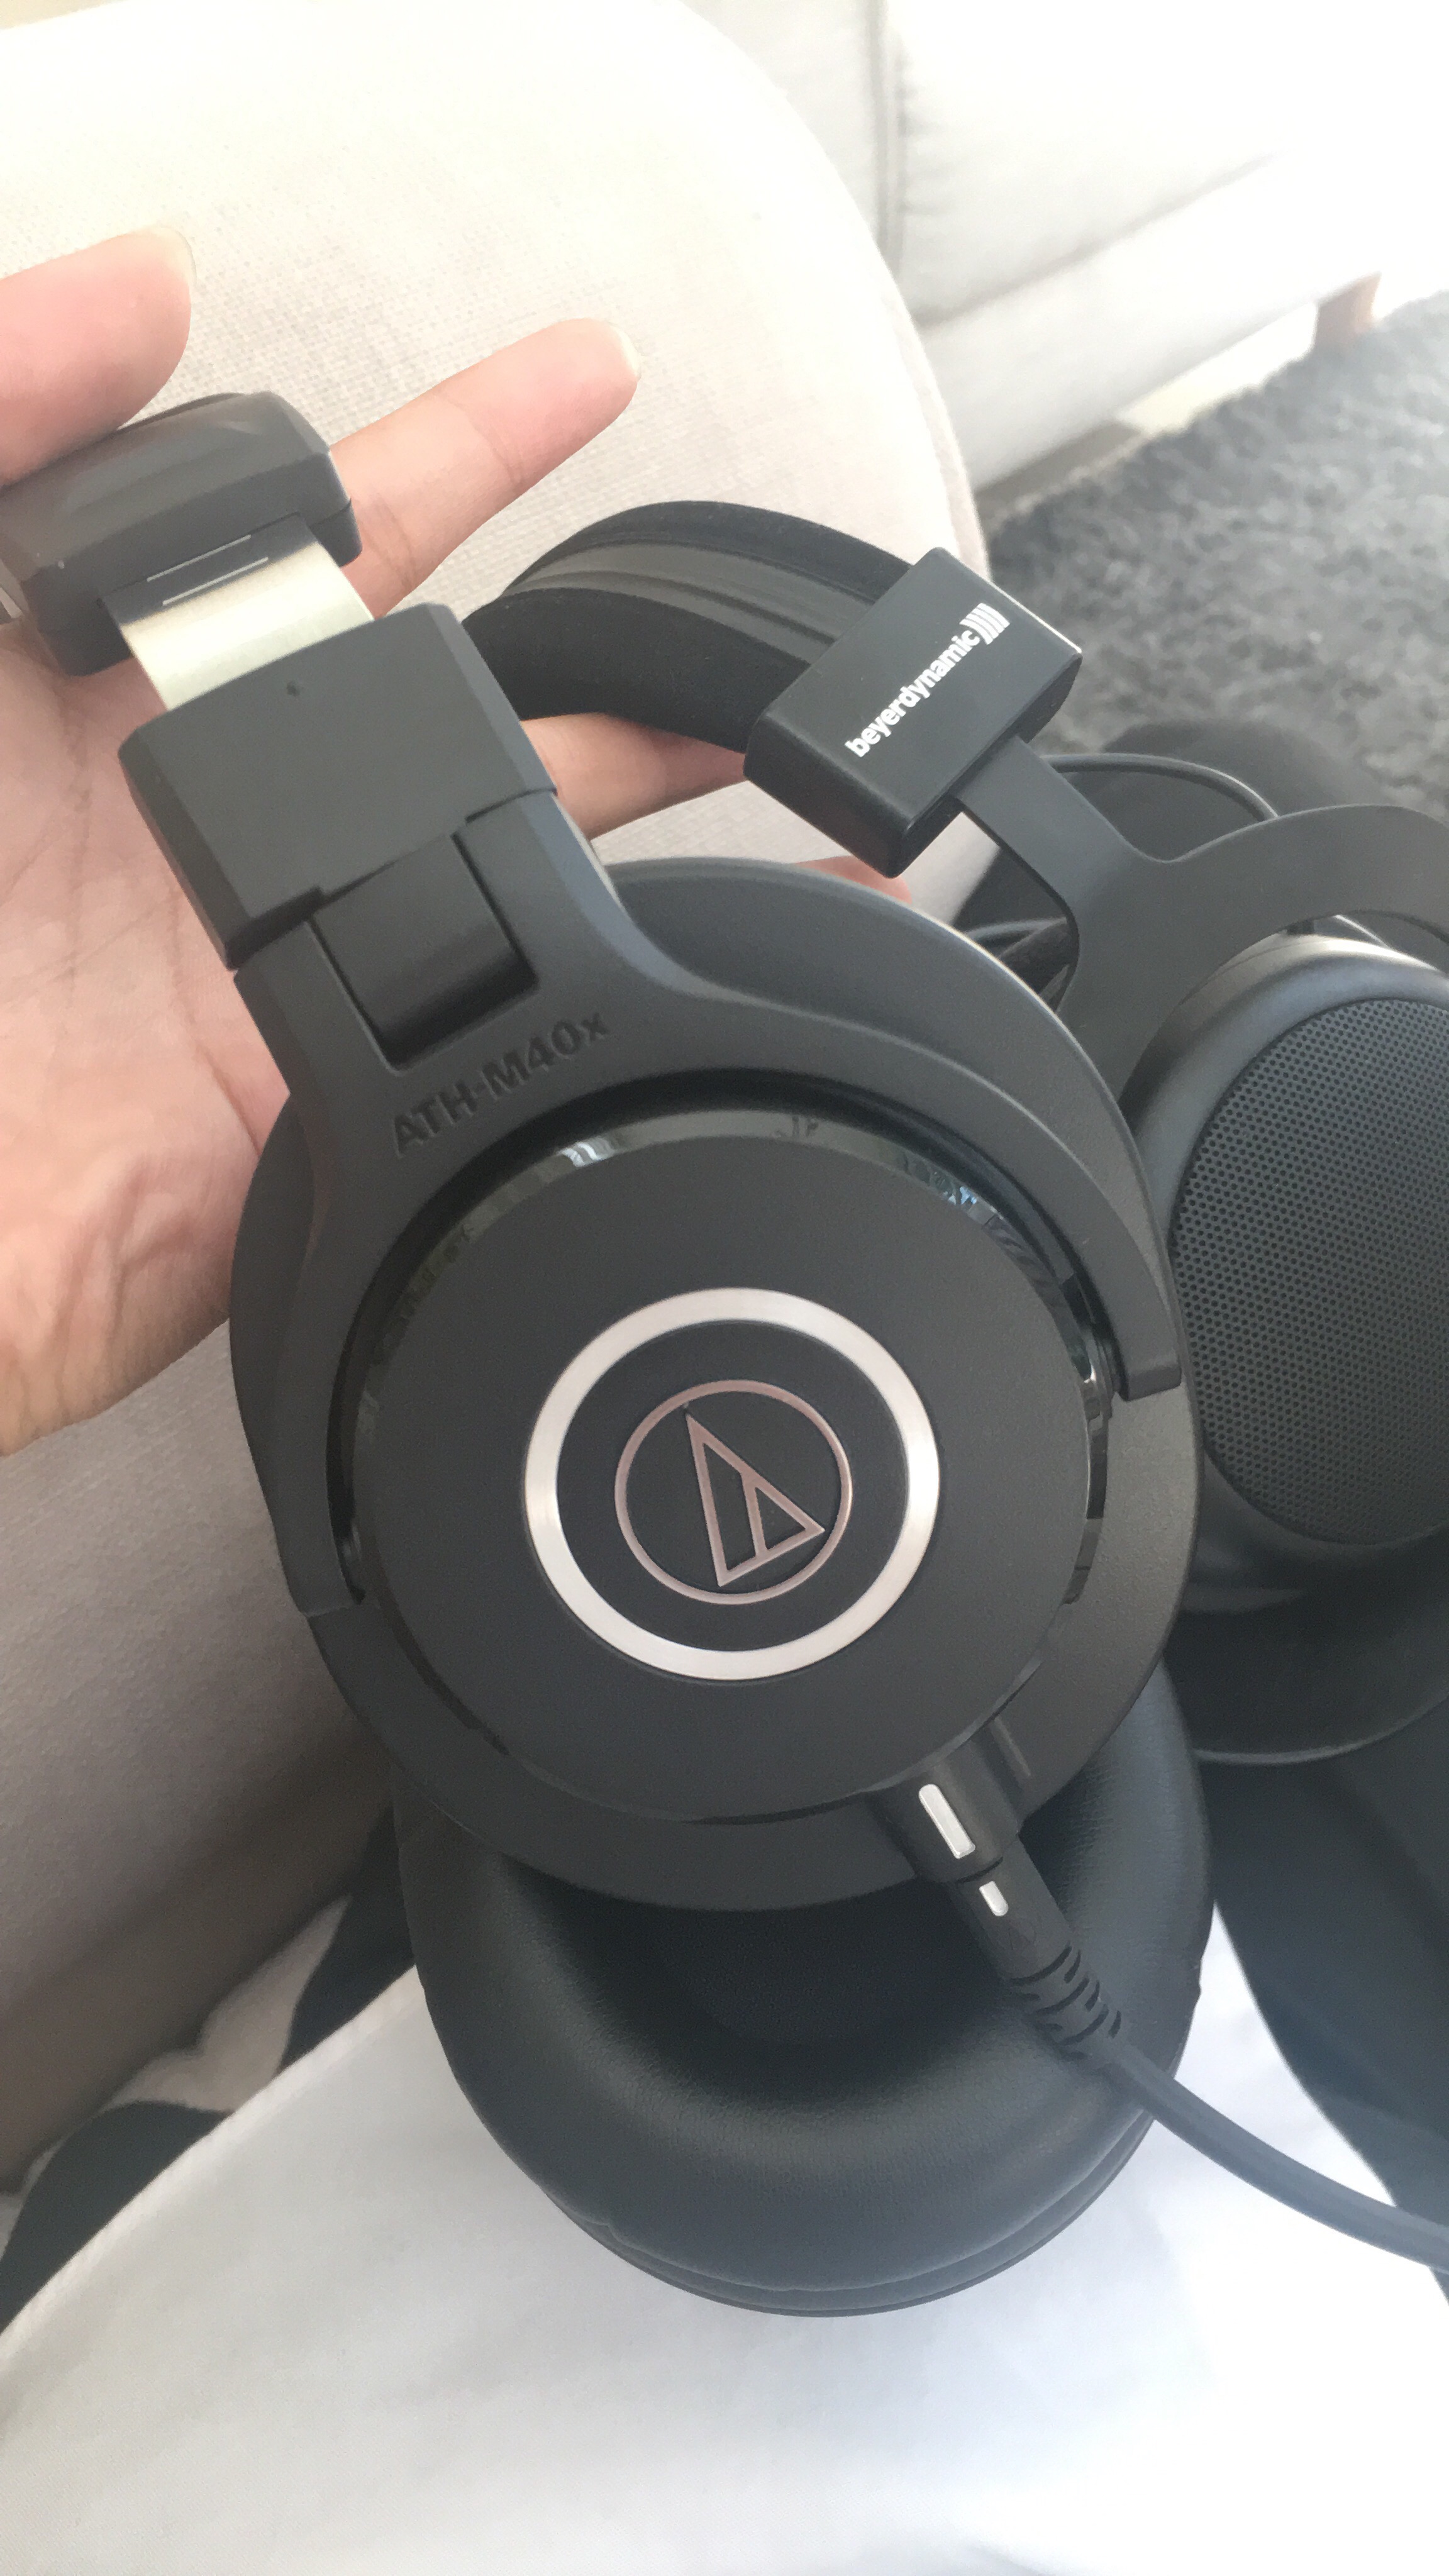
Audio-Technica ATH-M40x, the Japanese budget champion for $100
Audio-Techina (ATH) has been doing business since 1962 as a phono cartridge manufacturer. Since its founding in Japan back in the 60s, ATH has won numerous awards for its innovative audio products e.g. cartridges, turntables, condenser microphones and headphones. In 2010s, the company becomes more well-known in consumer market as a ‘hi-end’ headphone maker, with its most recognizable lines being crafted wooden headphones and M-series closed studio monitors.

M40Xs are collapsible and foldable for portability
After seeing ATH’s and Sony’s overwhelming lines of closed cans, I came to my own conclusion that because the Japanese are somehow very reserved and shy people, they tend to prefer ‘closed’ headphones to prevent sound leakage. Note that ATH also made one very phenomenal line of open headphones, the AIR series, which has evolved into R70X.
M40X closed monitors, and DT880 open-back monitors
Our headphones reviewed today, ATH-M40x, are from the company’s best-selling ‘headphone’ line, the M-series. M-series headphones are closed monitors. The line ranges from $50 M20x to $300 M70x, with M50x (around $150) being the best-seller.
Features and Specs (M40x)
- Angled 40mm moving-coil drivers with lightweight CCAW voice coil and Neodymium magnets
- Impedance = 35 Ohm
- Sensitivity = 98dB (no voltage or wattage provided)
- Max. Input = 1600mW at 10kHz
- Proprietary detachable cables included (1.2-3M coiled, and 3M straight)
Measurement (Reference Audio Analyzer)
M40Xs being compared to my other ‘reference-class’ headphones
Subjective Impression
AT-M40x headphones (from now on M40Xs) sound tonally flat, with no emphasis on particular frequency region. Compared to my reference Beyerdynamic DT880, the M40Xs have much more low-end and slightly less trebles. DT880s have more airy sound, and wider and more natural imaging, presumably because of the German’s open-back construction. Midrange is more meatier compared to the beyer’s, but still so clean without coloration. Compared to more forgiving phones, say, AKG K7XXs, M40Xs do sound more revealing than the AKG’s. The isolation is pretty good, which is the reason why I bought them to use in noisy environments or on flight/ The M40Xs make perfect tracking monitor headphones
Despite being closed cans, they sound somewhat airy, and not congested as much as I recalled M50Xs do. The M40Xs have smoother FR curve, without stupid bass and treble boost present in M50Xs.
For those saying monitors sound thin, dry, and bright, I think it’s mostly because they’re used to heavily colored cans with boosted bass. I’m 20 now (2017) and have intact hearing to 18kHz but never found any of my cans to be harsh, but speaking of trebles, the DT880s sound brightest, followed by M40Xs and K7XXs respectively.
From memory, they sound very much like their direct $100 competitiors Shure SRH440, with M40x having more bass and less forward mids. IMO SRH440s are more accurate and better with fast music.

One thing I dislike: the stupid proprietary detachable cable
Build Quality & Comfort
They’re labelled ‘Taiwan’ and are very well made. The material, the construction, and everything else is the best for $100, and I personally think they’re better made than DT880s (Germany) or K7XXs (China). They can flip, tilt, fold, a true headphones for 21st century wherein space really matters.

Nicely built, dat bevels, that ‘click’ when you adjust the headband. Couldn’t asked for more for $100 headphones.
For durability, they are nonetheless not better than tank-like DT880s that have bulletproof archaic construction.
Comfort-wise they are mediocre. Being a closed headphones, the earpads do heat up sometimes even in air-conditioned room. But still very much better than any Grado’s.
